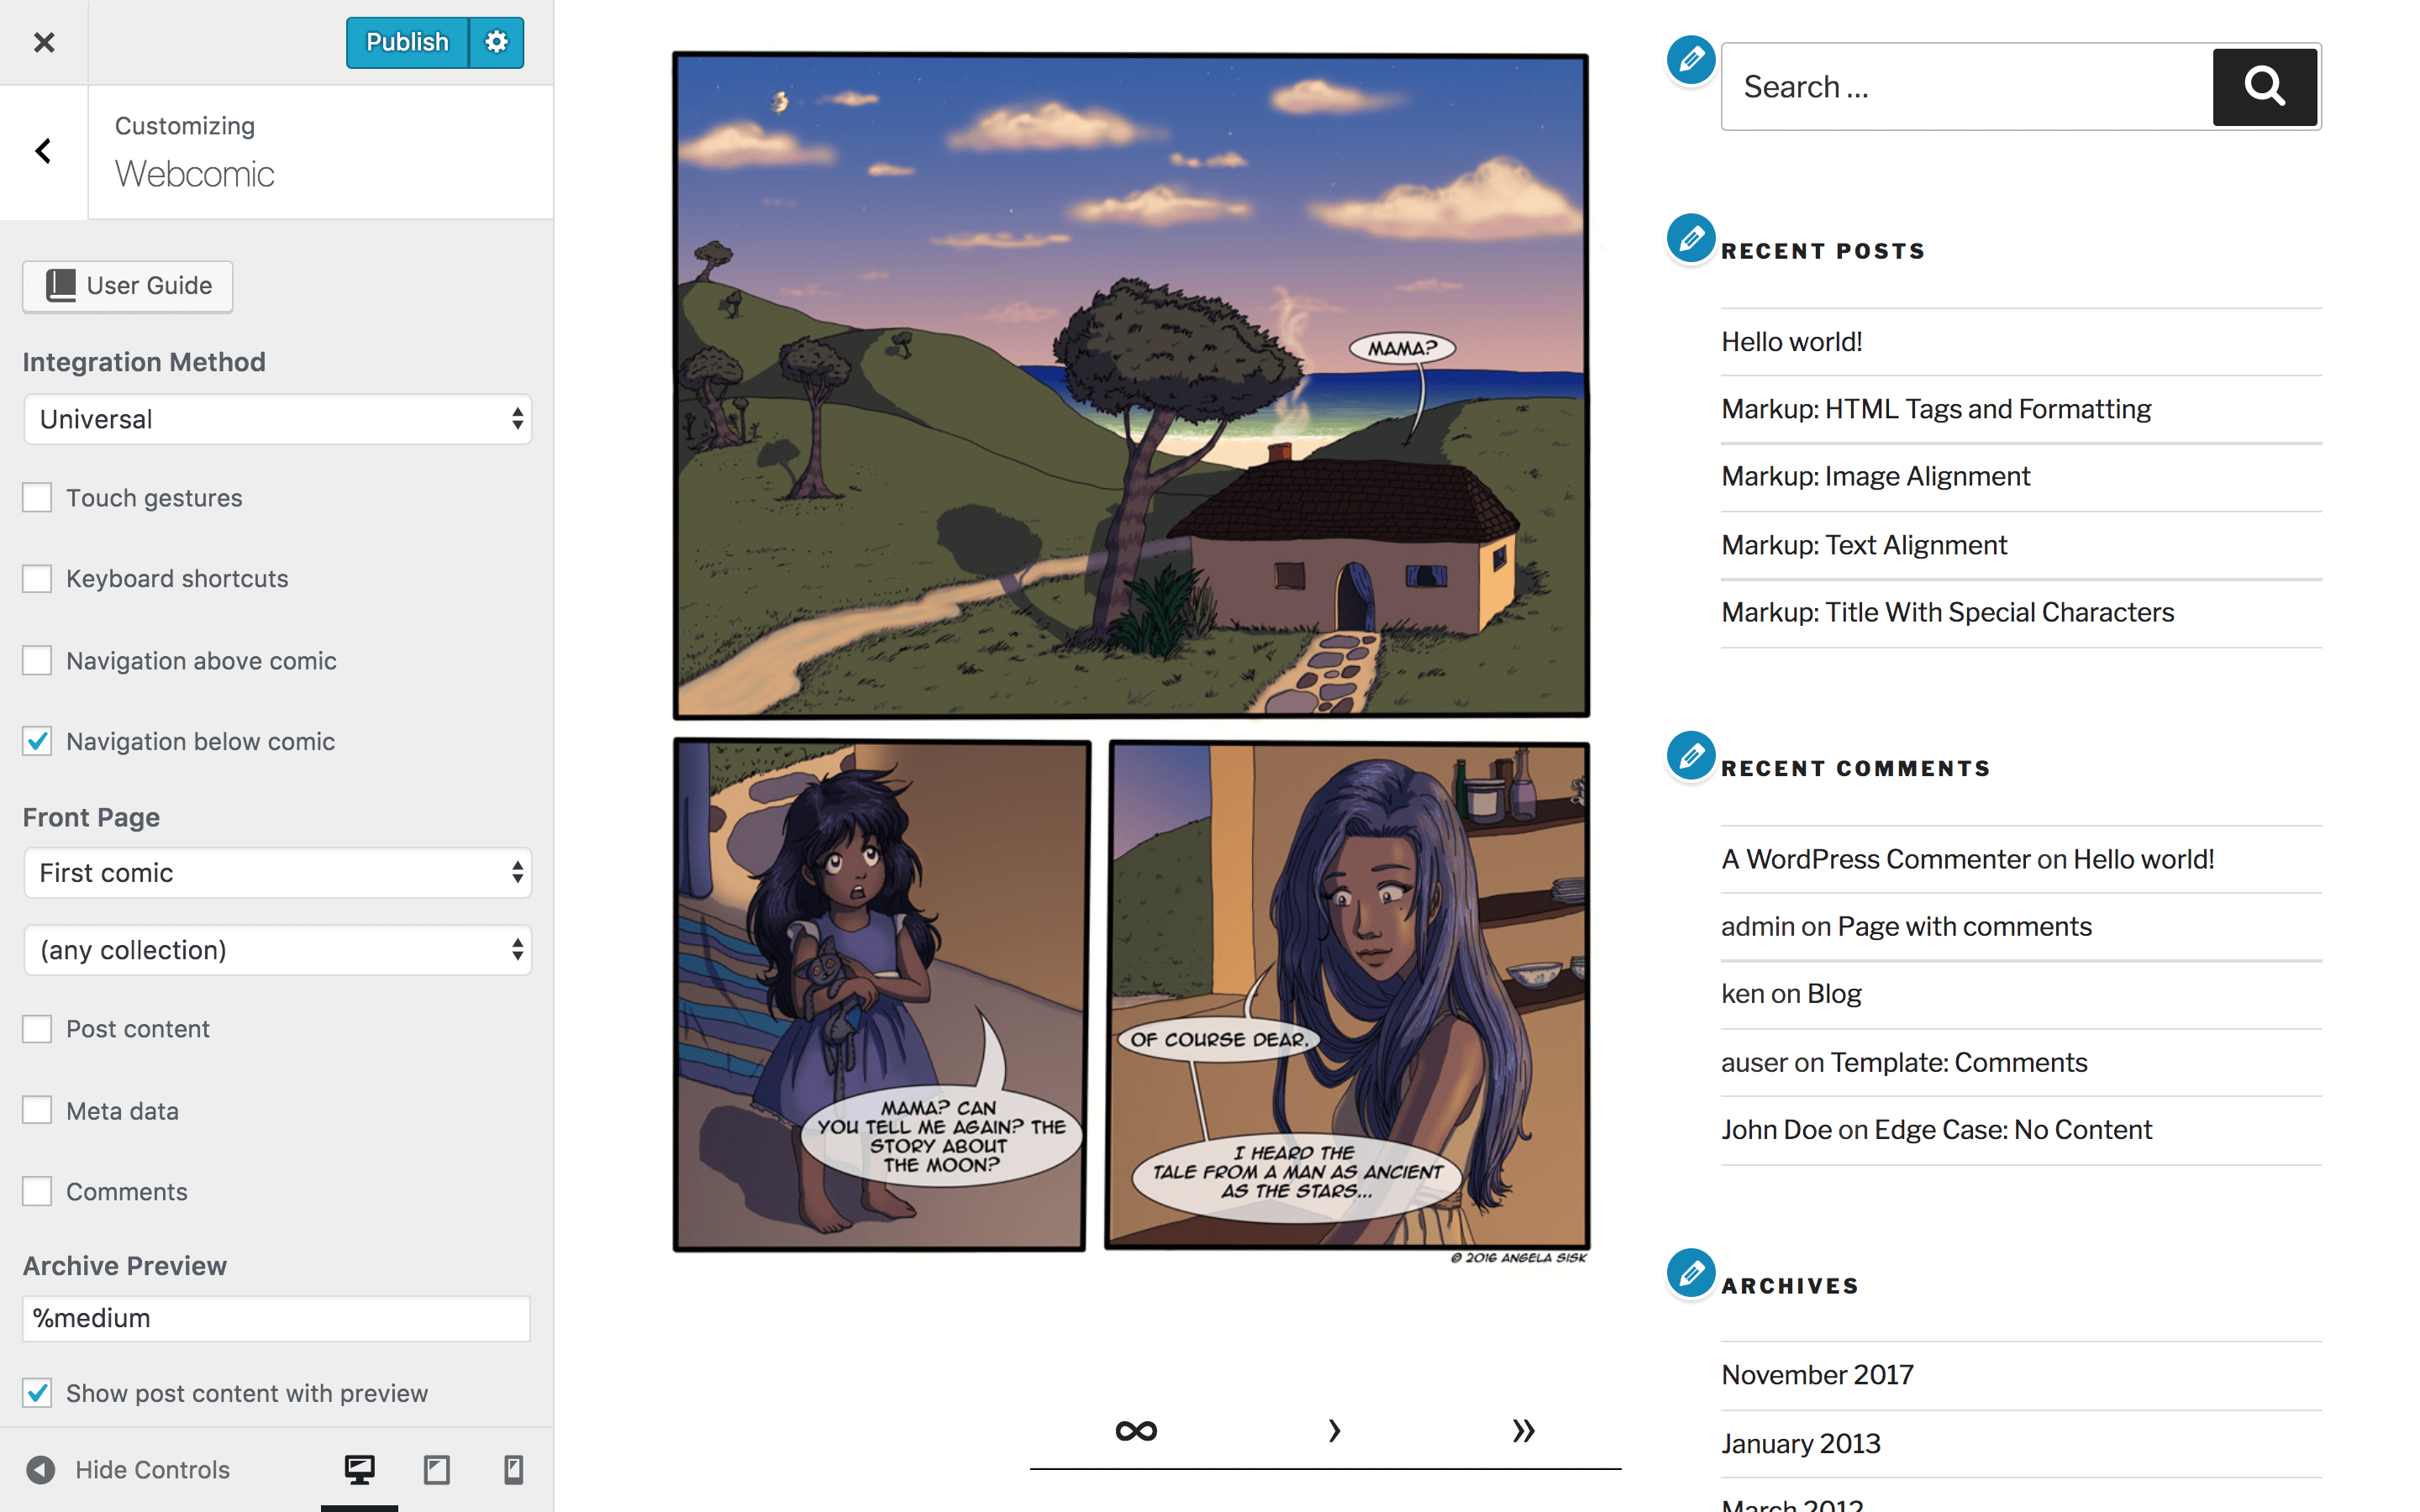
This is the Webcomic section of the Customizer, a special section added by Webcomic which lets you control how Webcomic integrates with your theme. Combined with special widget areas, you’ll be able to customize the look-and-feel of most of Webcomic’s features using the Customizer.
It’s all in the method
To start, you’ll need to select an integration method, which will tell Webcomic how it should try to integrate with your theme.
Universal
This is Webcomic’s generic integration method, for use with most WordPress themes. More often than not this is the integration method you’ll want to use.
Webcomic
This is Webcomic’s standard integration method, for use with themes built specifically for Webcomic or themes modified to use Webcomic’s integration actions – which we’ll talk about in a moment.
Comic Easel
This is Webcomic’s custom integration method, for use with the ComicPress theme or themes designed specifically for the Comic Easel plugin. If you’re moving from Comic Easel to Webcomic and want to keep your Comic Easel theme, this is the integration method you’ll want to use.
Integration woes
Theme integration is a complicated technical challenge, and doesn’t always work with every theme. So what happens if you’ve tried every integration method and none of them work? Fear not; it might take a little extra effort, but you can still integrate Webcomic with your theme using integration actions.
Show me those integration actions ⇝
Integrate it your way
Once you’ve found the integration method that works best for your theme you can fiddle with Webcomic’s integration options, explained here.
Touch gestures
Enable touch gestures if you want to allow readers to navigate your comic using the following touch gestures on touch-enabled devices:
- Swipe Left: Previous comic
- Swipe Right: Next comic
- Swipe Left (two fingers): First comic
- Swipe Right (two fingers): Last comic
- Swipe Down (two fingers): Random comic
Keyboard shortcuts
Enable keyboard shortcuts if you want to allow readers to navigate your comic using the following keyboard shortcuts:
- Arrow Left: Previous comic
- Arrow Right: Next comic
- Arrow Left + Shift: First comic
- Arrow Right + Shift: Last comic
- Arrow Down + Shift: Random comic
Navigation above/below comic
These options let you show or hide standard comic navigation links above or below the comic.
Front page comic
This option let’s you display the first or last comic on your site’s front page, or no comic at all if you don’t want comics on the front page. If you do choose to show a comic on the front page, there are more options available to you.
Comic collection
This option let’s you restrict the front page comic to a specific collection. By default, comics from any collection can appear on the homepage.
Comic content, meta data, and comments
These options let you show extra comic information on the front page, including the comic content or blog, meta data like tags and categories, and comments – including the ability to submit comments on the front page.
Archive preview and content
The archive preview option lets you specify a preview format to use on WordPress archive pages; it accepts special tokens that Webcomic translates into comic previews. If you do include comic previews on archive pages, you can optionally hide the comic content – or blog – on archive pages as well.
Widget areas
Besides an array of integration options, Webcomic provides three unique widget areas that allow you to use widgets to customize the appearance of major integration sections. If you don’t see one of these areas in the Customizer, check the Appearance > Widgets screen. Adding a widget to any of these areas will override the standard widgets Webcomic uses for them.
Webcomic Media
This widget area controls the display of comic media. By default, Webcomic uses the Webcomic Media widget to display the full-size media for your comic.
Webcomic Navigation
This widget area controls the display of comic navigation. By default, Webcomic uses the First Webcomic Link, Previous Webcomic Link, Random Webcomic Link, Next Webcomic Link, and Last Webcomic Link widgets to display a standard set of comic navigation links.
Webcomic Meta
This widget area controls the display of comic meta data. By default, Webcomic doesn’t include anything in this area, but it’s a good place to add widgets like a list of related comics or advertising widgets.
Widgets for everything
You can put any widget you like into these areas, and Webcomic provides a lot of comic-specific widgets that should let you build almost anything you like. Playing around with widgets is the best way to see what they do, but this guide also includes a complete widget index that explains how every Webcomic widget works.
First steps
Congratulations, you’ve taken your first steps with Webcomic! By now you should have at least one published comic – fully integrated into your site – and you’re welcome to go on publishing comics and making a name for yourself on the web. Before you go, though, you might want to read a little bit more about everything you can do with Webcomic.
For starters, Untitled Comic is a poor name. When you’re ready to properly brand your comic – and explore the variety of settings Webcomic offers – head back to the All Comics screen and click on the Settings link for your comic.
