The Character and Storyline components allow you to tag character appearances, organize comics by storyline, and use taxonomy-based archives. Both components have the same set of features, so we’ll focus on the Character component for the rest of this section. Everything here applies to the Storyline component as well, though.
Managing taxonomies
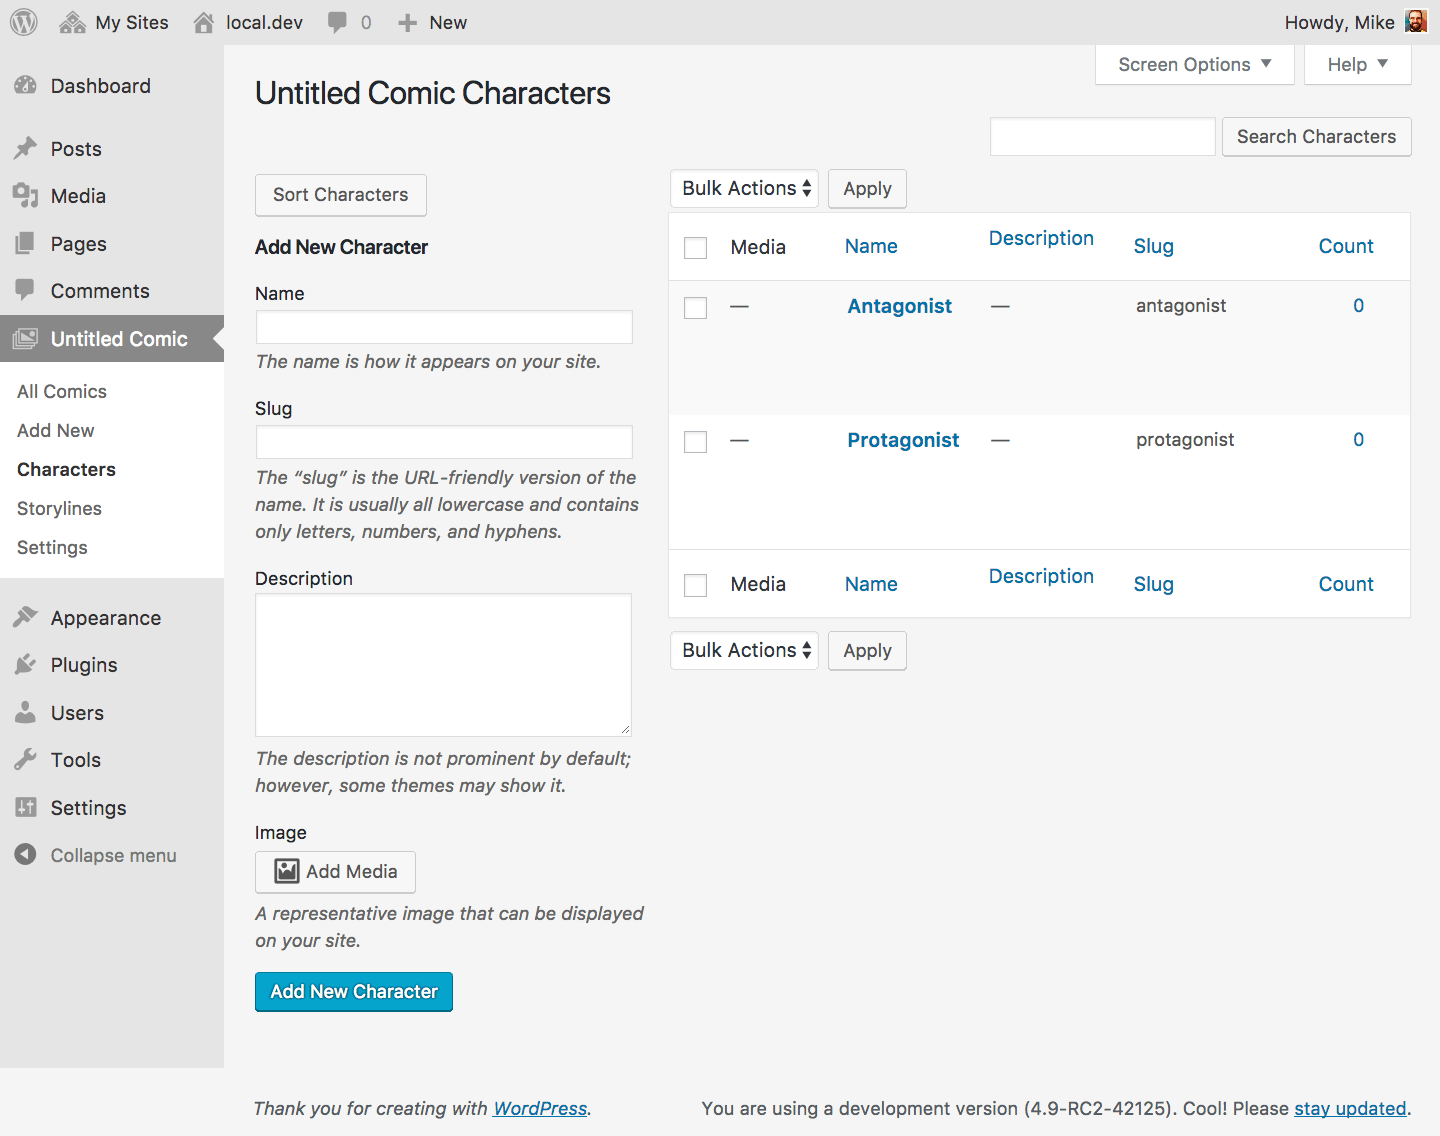
Your collections should have a new Character sub-screen. This is where you’ll manage the characters for your collections; from here you can create new characters, edit or delete existing characters, and change the custom sort order for characters. This screen is almost identical to the Categories or Tags screens, with two notable exceptions: the Sort Characters tool and the ability to add character media.
Term media
The Media column in the character list shows you the media associated with a given character. You can click on the thumbnails in the media column to go to the Edit Media screen for that media item.
Adding media
You can add media to a new character by clicking the Add Media button on the form next to the character list. This will display the standard WordPress media popup, which lets you upload new media or select existing media from your library. You can upload or select a media item to associate with your character.
Once you’ve selected the media you want to associate with your character, click Update. A preview of your selected media should appear. Click Add New Character to save the character with their media.
Changing media
If you want to change the media associated with a character, click the character’s name to go to the Edit Character screen. From here, you can click the Change Media button – which replaces the Add Media button – and select new media for your character.
Removing media
If you want to remove the media associated with a character, click the character’s name to go to the Edit Character screen. From here, you can click the X in the corner of the media item to remove the media.
Sorting terms
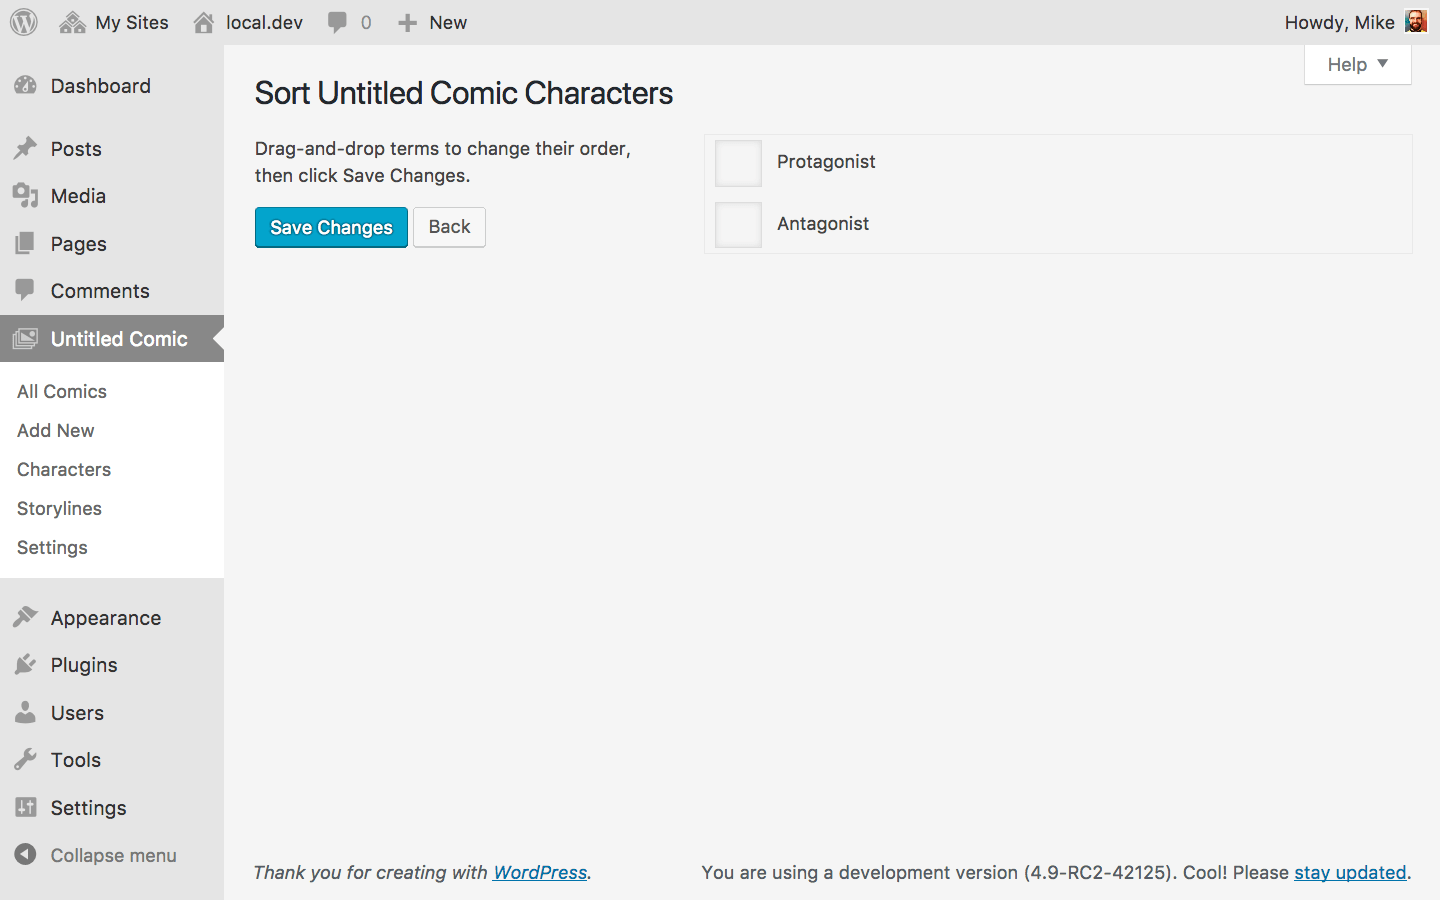
From the Character sub-screen, click Sort Characters to go to the character sorting tool. This tool allows you to manually sort the terms in your comic collection. Drag-and-drop terms to change their order, then click Save Changes. You can nest or unnest hierarchical terms using the sorter as well, which will change their parent term.
Character’s aren’t hierarchical by default, but we’ll talk about how you can make them hierarchical below.
Using taxonomies
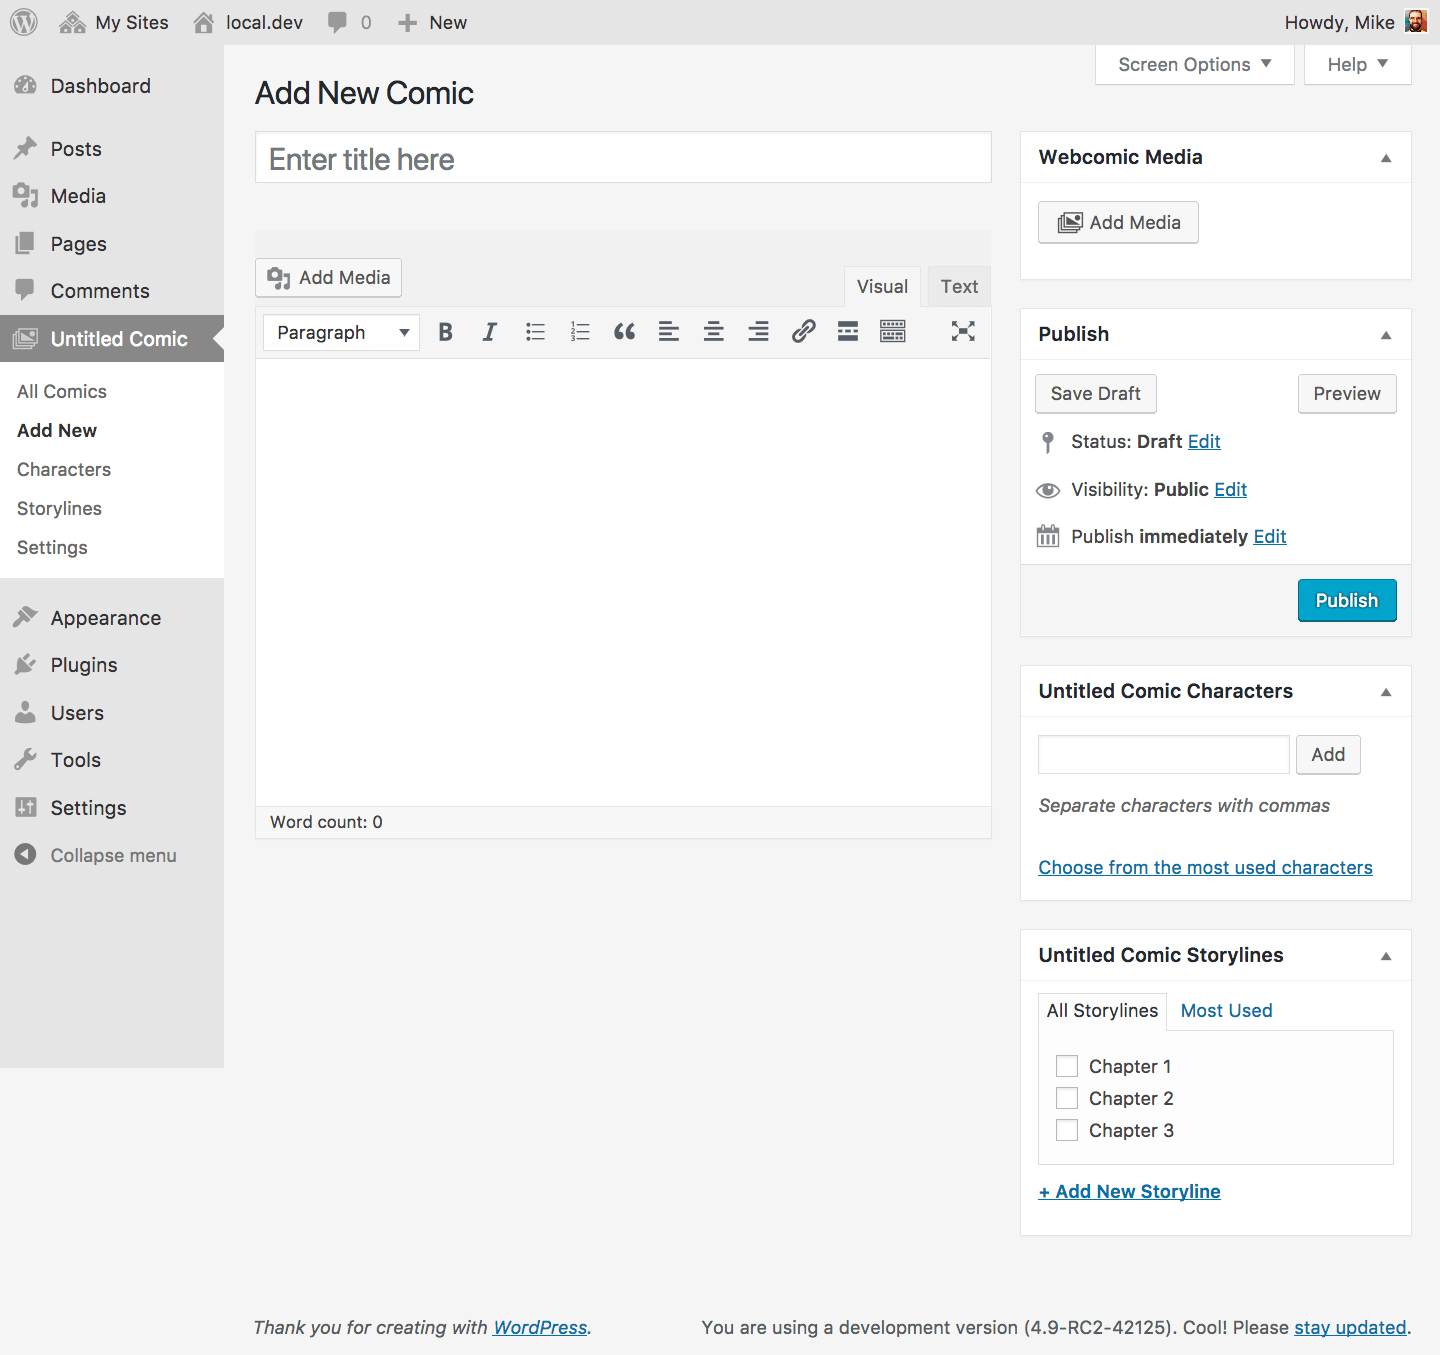
On the Add/Edit Comic screen you should notice a new Webcomic Characters box. This box works like the Tags box you see on the Add/Edit Post screen; you can type a character name in the box and either select an existing character or add a new character to assign to your comic. You can also choose from a list of most used characters.
If your characters are hierarchical, the box will work like the Categories box you see on the Add/Edit Post screen. You’ll be able to check one or more existing characters or add new characters from the box, as well as choose from a list of most used characters.
⚠ Be careful when assigning a comic to more than one storyline. It’s common for narrative-heavy comics to use storylines, and for users to be able to navigate comics by those storylines. If you plan on doing this, it’s best to assign your comics to one storyline at a time. Keep reading for more information about the complexities of storyline navigation.
Settings
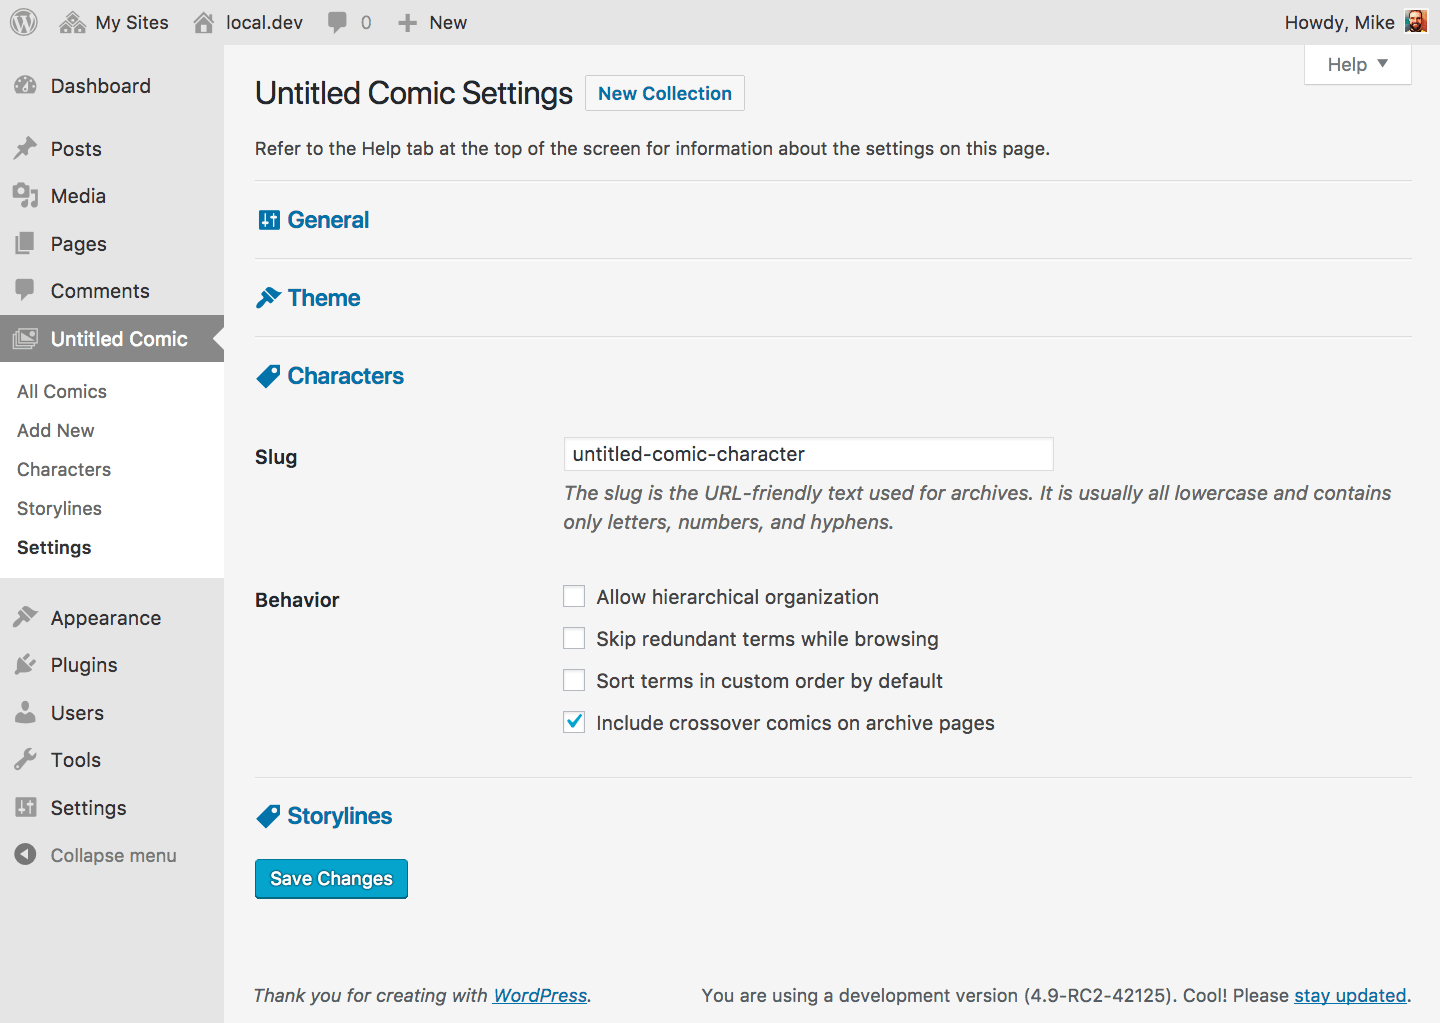
Character settings allow you to change some of the basic features related to characters.
Slug
The slug is the URL-friendly text used for archives. It can contain lowercase letters, numbers, and hyphens. This setting has no effect with Plain Permalinks.
Behavior
These settings control how characters in your collection behave.
Allow hierarchical organization will allow you to assign characters to other characters, creating a parent-child relationship.
When browsing hierarchical characters using previous/next links, it can be difficult to determine which character is previous or next. For example, if a character named Birdie has three child characters – Charlie, Dan, and Eagle – and a user is looking at Charlie, the previous character is normally Birdie (the parent of Charlie). Likewise, if a user is looking at Birdie, the next character is normally Charlie (the first child of Birdie).
Skip redundant terms while browsing changes this default behavior so that a previous character can’t be an ancestor of the current character, and a next character can’t be a descendant of the current character. Using our previous example, let’s say Birdie has two siblings – Adon and Furiosa (ordered before and after Birdie, respectively). If a user is looking at Charlie, the previous character will be Adon (the first character that isn’t an ancestor of Charlie). Likewise, if a user is looking at Birdie, the next character will be Furiosa (the first character that isn’t a descendent of Birdie).
Sort terms in custom order by default will force characters to list in your custom-defined order by default. You can change the actual sorting order on the character management screen.
Include crossover comics on archive pages will cause any comic from any collection tagged with a character from the current collection to show up in that character’s WordPress taxonomy archive page. Otherwise, only comics from the current collection will appear in the archive. You can view an archive of crossover comics for any character by adding /crossover to the end of it’s archive URL.


